Showing posts with label White. Show all posts

December 28, 2014

She's Got the Whole World...

Base: Sinful Colors Snow Me White

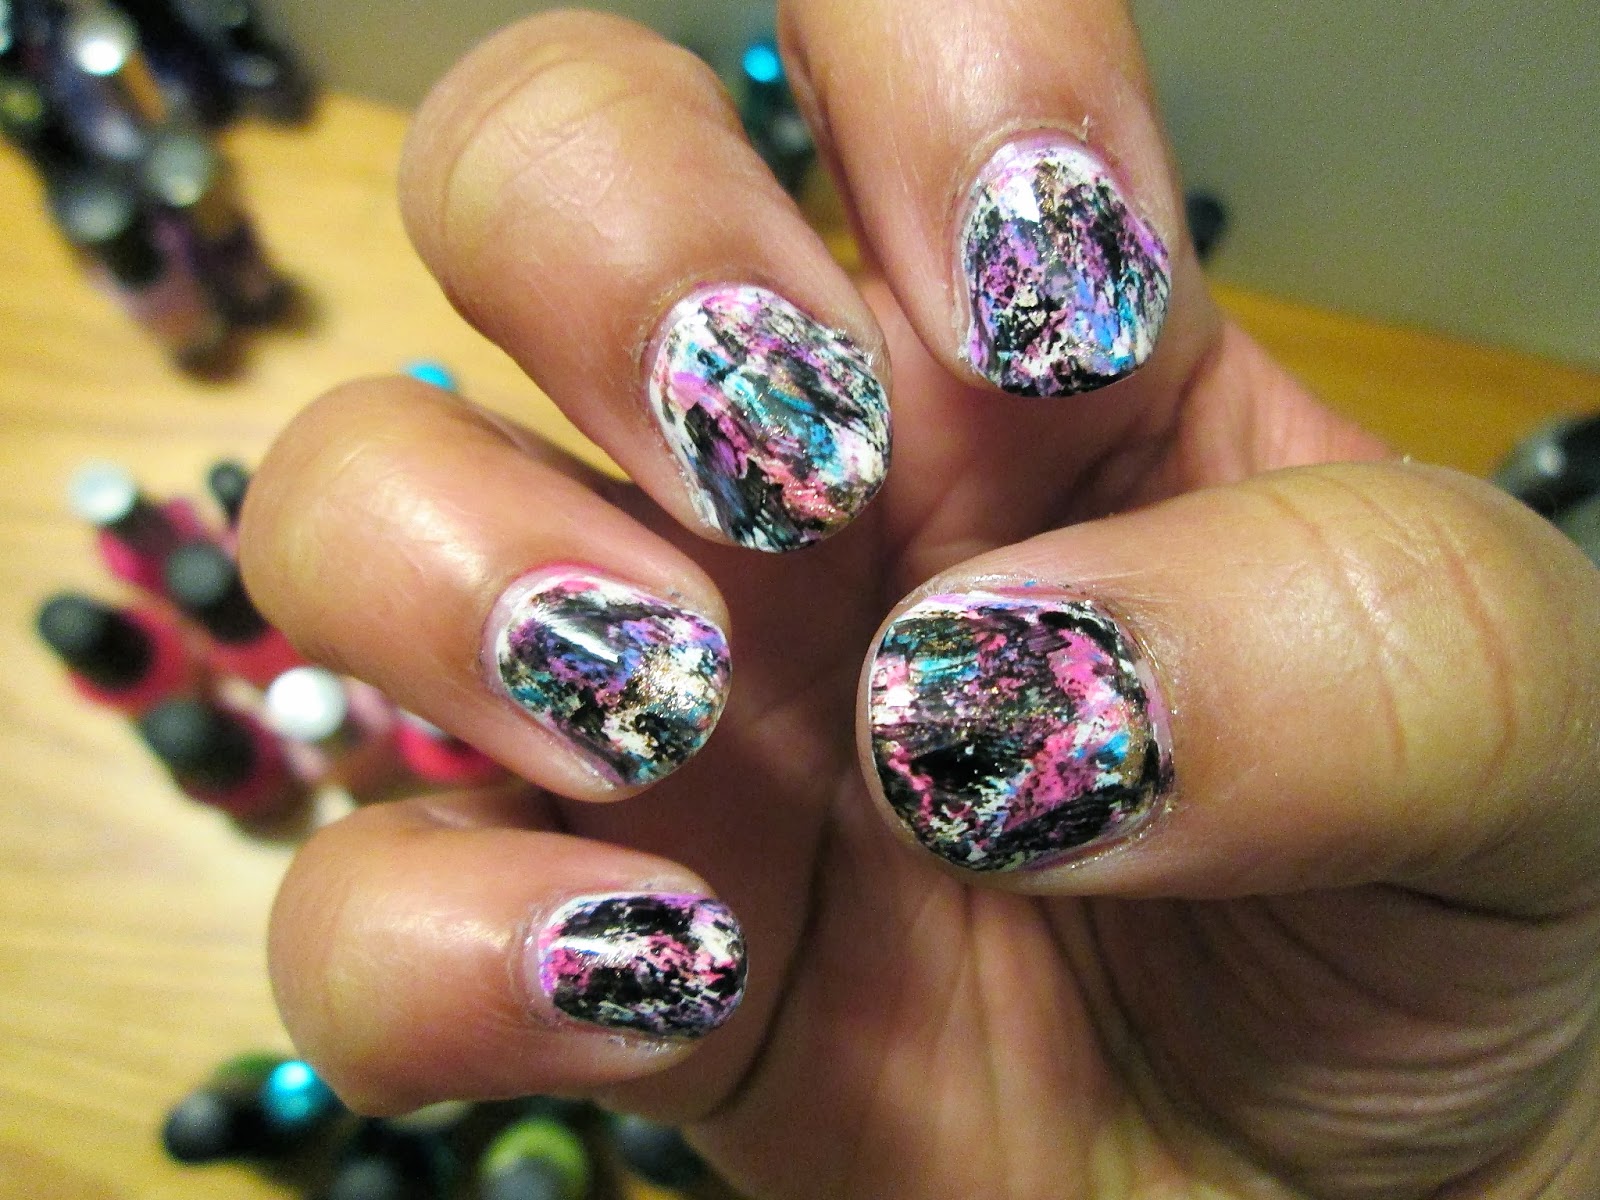
This was my first foray into the world of water decals, and I must admit: it was much easier than I thought it would be! I saw this post on Moustache Manis and I IMMEDIATELY fell in love with the faded map look of these decals.
I ordered them from BornPrettyStore, and shipping took about 3.5 weeks. The wait was long, especially considering how excited I was to order them. But considering they were only $1, and shipping from Hong Kong, I let it slide.
I applied them the day I received them, and the process was not as painful as I thought it'd be. Here's the step-by-step:
1. Apply base coat.
2. Apply 1 or 2 thin coats of base color. I used Sinful Colors Snow Me White.
3. After base color is completely dry, peel plastic from decal sheet, measure out small piece of decal, and cut out.
4. With tweezers, immerse cutout in water and hold for 15-20 seconds. The decal will begin to slide away from the paper backing.
5. Moisten nail by dipping it quickly into water.
6. Separate decal from backing, and press it into position on nail.
7. Hold firmly to nail, while smoothing out wrinkles and bubbles.
8. When decal is dry, clean up cuticles with pure acetone.
9. Apply thick top coat to seal.
10. Repeat.
I used two sheets for my nails, one per hand. If I was smarter about measuring, I might have been able to squeeze 6 or 7 nails from one sheet, but that's being generous. My nail beds are fairly wide, so I do believe some of my more petite readers could get all 10 nails done with one sheet. And if not, accent nails anybody??
My only negative about these decals is that it takes SO MUCH acetone to clean up around the cuticle. I went through so many Q-tips, plus the acetone stripped all moisture from my cuticle and the surrounding skin, which explains my crusty skin in the photos.

All in all, I loved these decals! So much that I ordered three more sheets in different patterns. I'm still waiting on those, though...


I've Got a Bag on My Hands

Full list of polishes below!

For my second style-inspired manicure (see the first here), I decided to put my purse on my nails!


I was really looking forward to this manicure because there are so many designs to choose from! I ended up choosing just five for my right hand, and diving right in!
I realize I've got a bit of work to do on my steadying my hand, but I'm unbelievably proud of the way it came out! I love the bright colors of the purse, and I think the designs translated seamlessly into a mix & match mani. (Which you all know I love!)
There isn't much else to say! If you have questions, feel free to contact me on my Tumblr page! Enjoy the photos!


List of polishes:
China Glaze Nude
Revlon Empower
Nicole by OPI Candid Cameron
China Glaze Too Yacht to Handle
Wet 'N Wild Candylicious
Sally Hansen Sun Kissed
LA Colors Circuits


January 28, 2014

It's my first Blogiversary!

Find a full list of polishes used at the end of this post!

That's right! Nails in D Major is a year old today!

I'm so thankful for all the support and encouragement that I've received over the past year. Without that extra push to create a "big girl blog," I likely would not be pushing myself to become a better artist every day.

On to the nails!
I wanted to do something cutesy and special, so I whipped up my favorite: a mix & match mani! Every design was created with a dotting tool. I love love love the little cupcake on my ring finger. I'm quite obsessed with it, so do not be surprised if you see a full cupcake mani soon! Because cupcakes are so simple to create (trust me, they're much easier than you think), there are a ton of tutorials on YouTube, and it shouldn't be hard to find one that works for your type of nail!
I'm not going to lie: the number 1 on my index finger was such a pain to get right. And it still did not turn out as clean as I would have liked it to be. Nevertheless, I am happy that my first foray into lettering was not a complete failure, and I'm so pumped to try again (and get better! ;))

It's been a wonderful year, and I look forward to many more!
Instagram: @donithax

List of polishes:
Base: Wet 'N Wild En Voyage
Sinful Colors Snow Me White
China Glaze It's a Trap-eze
Wet 'N Wild Candylicious
Wet 'N Wild Tickled Pink
KleanColor Red Alert
Essie Devil's Advocate


Yay, super-saturation!

January 27, 2014

Back to Basics: Leopard Print

L.A. Colors Circuits, Sinful Colors Snow Me White, and Maybelline Color Show Clearly Spotted

I absolutely adore simple black and white. It is so chic, and it can make the wildest of patterns (see leopard print above) appear elegant.
I should do black and white manicures more often! I could not stop staring at my nails when I wore these, and I was quite pleased with my 20 minute mani!
I painted the leopard print with a mid-size dotting tool, after two semi-dry medium coats of Circuits. I love that about dotting tools: I can begin working almost immediately after painting all 10 nails twice. As long as I'm dragging the polish lightly with the tool, I don't dig into the base coats. Then I slap on a coat of Seche Vite, binding all the layers of polish together quickly and without smearing. Done!


November 23, 2013

Chaotic Graffiti Nails

Sinful Colors Snow Me White, China Glaze That's Shore Bright and Goldie But Goodie, Sally Hansen Blue Me Away!, Wet 'N Wild Candylicious, and L.A. Colors Circuits
 Here's the story behind these nails: I had done this beautiful matte color blocking manicure, and I COULD HAVE SWORN that my nails were dry, but because there were so many layers of paint on my nails (from the top coat between tapings), they ended up looking like crap by the end of the day.
So I scrapped those nails, and decided to try something different. I saw this Chalkboard Nails tutorial, and decided that I wanted to give it a shot (it looked very doable, and I didn't have much time).
I love how they turned out, though they're not quite what the tutorial called for. I just loved layering the colors, and the barely-any-polish-on-the-brush technique.
My mom said that they are "beautiful and absolute chaos," and I have to agree.


July 23, 2013

Feature Presentation: Clearly Spotted

Nicole by OPI Candid Cameron and Maybelline Color Show Clearly Spotted
 I have been dying to try any of the Maybelline Color Show polishes, so when I saw them on sale at Walmart for only $2 the other day, I couldn't resist picking one up. Clearly Spotted immediately caught my eye; it reminded me of Lynnderella's Connect the Dots, which has eluded me for almost a year. The glitter is comprised of black and white hex and round glitters of different sizes, all suspended in a clear base.

I decided to layer it over Candid Cameron, which already has a bit of shimmer in it, and the end result is kind of blowing my mind. My camera cannot do it justice, but trust me on this: when my nails catch the light, it's damn near blinds me.
I'm really looking forward to combining this polish with others for different designs. What a great/cheap addition to my collection!


June 23, 2013

New Job, New Manicure, New Me

L.A. Colors Circuits, Sally Hansen Blue Me Away! and Disco Ball, Sinful Colors Snow Me White

Tomorrow, I begin my summer job, working as a TA (Teaching Assistant) for Upward Bound! We just finished a week of training, and the students arrive tomorrow! I'm so excited to learn, grow, and challenge myself in a new way! That being said, I feel like this summer is going to be a busy one, so I needed my nails to match! I am exhausted, so I fell on a go-to: a mix and match!


I fell in love with the glitter (Disco Ball, which I inexplicably overlook all the time) over a solid black polish, and just went for it with the designs. Nothing earth-shattering here, but I'm so thrilled with the combo of polishes, along with the matte finish. I would use it more often, but it takes forever to dry, and it always smears (#struggles)!


That's it from me! I'll try my best to keep up with weekly posts, but with the way my schedule is looking, painting my nails may have to be put on the back burner :(


April 17, 2013

A New World, A New Manicure

China Glaze Snap My Dragon and Sephora Conceited with Color Club striper in Fine Gold and Sinful Colors Snow Me White
 This weekend, I'll be in Bowdoin's production of Songs for a New World! I'm beyond excited; there is a wonderful cast, and we've been working really hard! Also, I get to play Mrs. Claus. Since the dress for the show is only a black top with blue jeans, I need to spruce up other aspects of my look. I decided to roll with the Claus/Christmas theme, and do a little something on my nails.
At this point, I am willing to admit that I am addicted to mix & match manicures. They're always my go-to, and it gives me a chance to try new things. Like the design on my thumb! I've never tried it, and I love it so much, I did it on all of my right fingernails. And I think my nails will channel Christmas, but not look wholly festive.
Here's to hoping we break a leg!

in indirect sunlight

March 31, 2013

Springtime Mix & Match!


Revlon Empower, Love & Beauty Sky Blue, Sally Hansen Lightening with Sally Hansen Disco Ball Sinful Colors Snow Me White
Here in Maine, we've been experiencing a streak of days with temperatures above 50ยบ F, so it feels (kind of) like spring! To celebrate, I wanted to do something bright and fun on my fingernails! I didn't do anything new, but a nice mix & match always does the trick for me. My only rule was that I needed to use colors that I haven't tried before. I'm so in love with the Sky Blue; it's light and cutesy, but it is opaque in two coats, which is wonderful!
I really like the color combination, and the subtle coat of glitter. The effect'll be awesome once I get some sun on these bad boys!


Related Posts Plugin for WordPress, Blogger...