January 4, 2014

Just Plain Sophisticated

Essie Devil's Advocate, China Glaze Too Yacht to Handle, and China Glaze Icicle

As you all know, I'm such a fan of manicures that look like they took forever, but they really didn't. That's exactly what this is! If you have a couple colors of polish, some Scotch tape lying around, and a dotting tool (or make your own, if you don't have one), you can recreate your own version of this manicure within a half hour.
Instead of using a nude polish as a base, as I did in this tape mani, I just put on a couple layers of base coat (I use OPI Matte Nail Envy), and let it dry completely before proceeding. Granted, this might not be the best option if you have staining from a previous manicure. If you do have staining, I would suggest buffing your clean dry nails just a little bit to see if you can buff away the surface stains. Too much buffing will weaken your nails, and if the stains do not readily come out, just swipe on a thin coat of a nude polish (for this look), or your favorite creme.
Once the base coat dried, I taped off the bottom half of my nails on a diagonal, and painted Devil's Advocate on my tips, enough for opacity. I recommend putting the tape on your hand before putting it on the nails, because Scotch tape will readily rip up your base coat! I loved the look with the plain plum tips, but I tested out the dots on my left hand, and loved it even more! The dots can also function to help cover up a crooked tape line, or other tiny mistakes. It's a win-win! I finished with a coat of Seche Vite, and boom! Done!
I hope you enjoy these nails! For more manicures that don't make my main blog, in addition to mani updates right after I complete them, follow me on Instagram @donithax!


Christmas Nails!


BREAKING NEWS: GLITTER IS DIFFICULT TO PHOTOGRAPH, ESPECIALLY IN HORRIBLE LIGHTING.
This seems intuitive, but I went ahead and wore these glitter bombs I call nails for Christmas. Don't get me wrong, I love this manicure so much (especially when compared to 2012's Christmas nails). I wish I could've captured their beauty more accurately for all of you.
I'm at home in Georgia for winter break (whoooo! the semester's finally over!), and the lighting at home is very dim and yellow (damn incandescents). I resorted to taking these photos in the bathroom, where I could find the brightest light, so please excuse my conditioner and soap in the background...
This mani combines my favorite things: glitter, gradients (done with a wedge makeup sponge), and dots (with inexpensive dotting tools)! I hope you love them as much as I do!


Simple Manis Just to Get Me Through

Sephora Conceited and Sally Hansen Mint Sorbet

Finals period at Bowdoin is no joke! I couldn't stand the thought of going through the final stretch with bare nails, so I turned my break time into mani time! These are (very) quick designs that I did not think through; I just went for it. I knew I needed some glitter, because it always seems to cheer me up, and it lasts a long time.
I added an extra blurry photo of Conceited because there is no way to properly photograph this color, I'm convinced. I also tried here, but the struggle bus rolled into town once again...
At any rate, I hope you enjoy these manicures! They literally take only 10 minutes (even less with a fast-drying top coat, like Seche Vite or Dries Instantly)!


China Glaze Running in Circles and an unnamed light green Kiss Striper


November 23, 2013

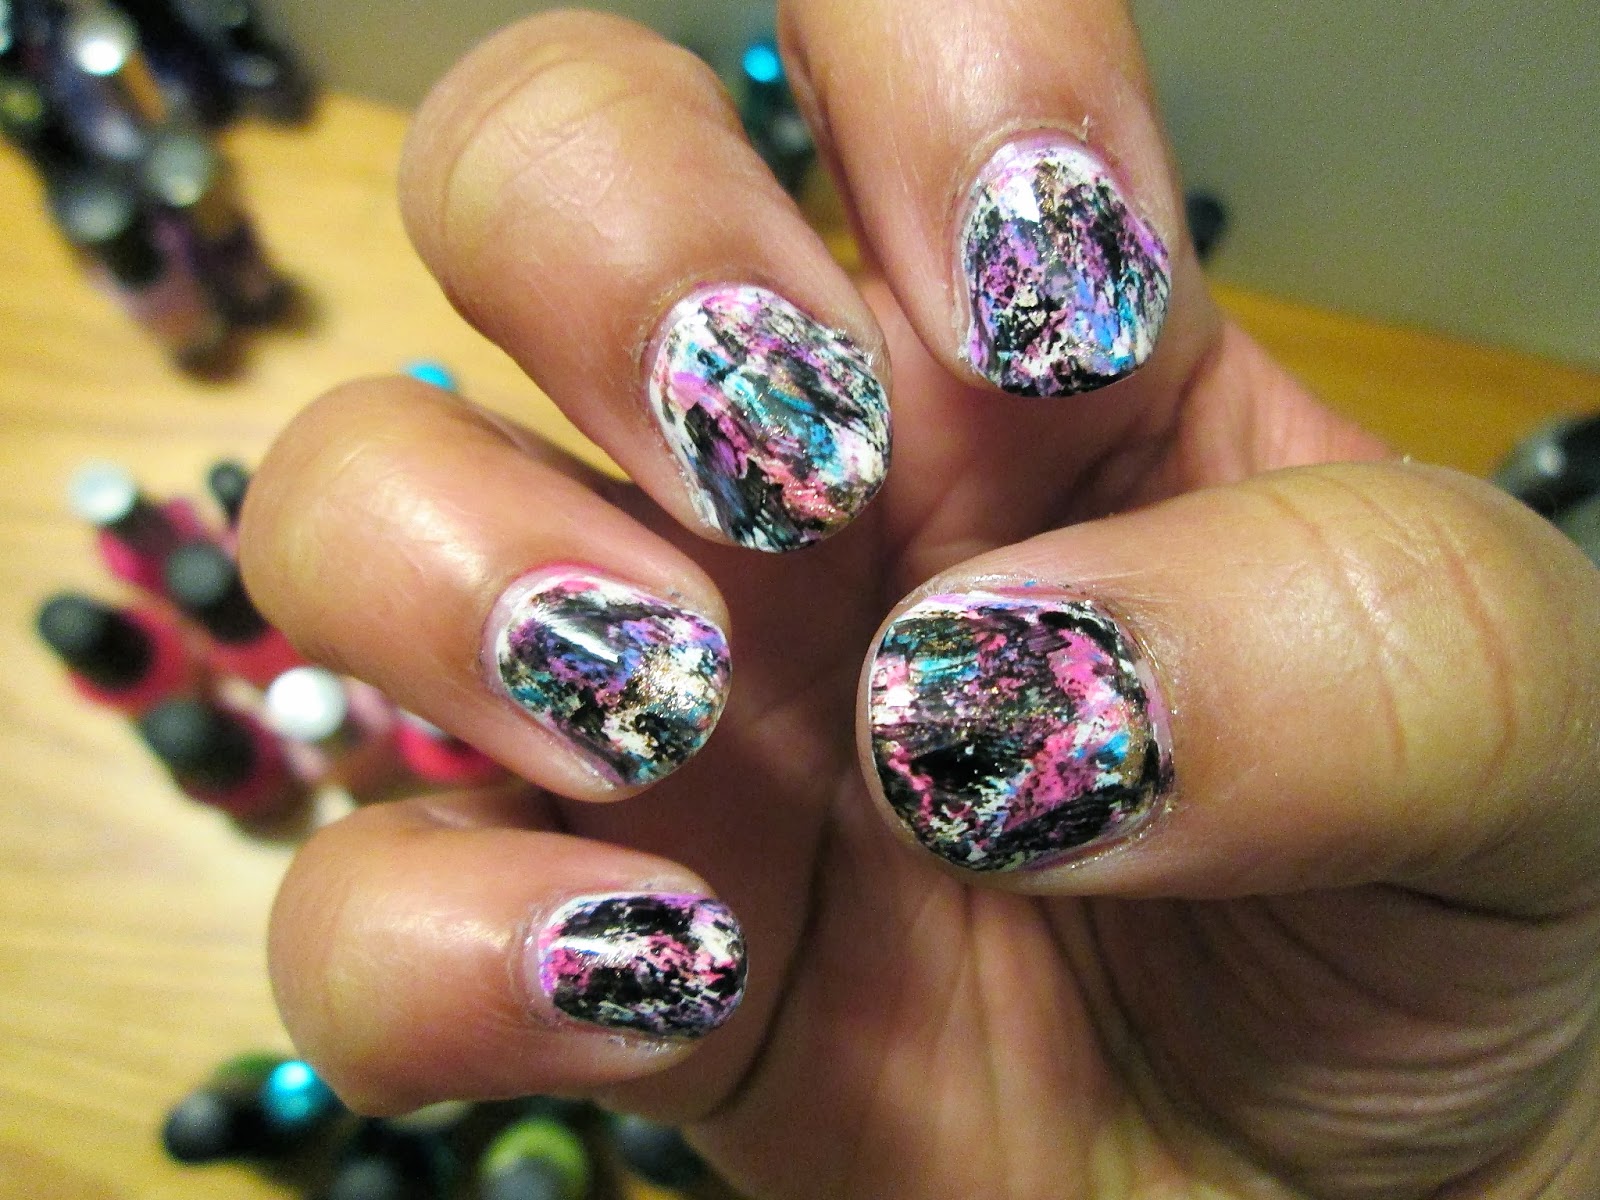
Chaotic Graffiti Nails

Sinful Colors Snow Me White, China Glaze That's Shore Bright and Goldie But Goodie, Sally Hansen Blue Me Away!, Wet 'N Wild Candylicious, and L.A. Colors Circuits
 Here's the story behind these nails: I had done this beautiful matte color blocking manicure, and I COULD HAVE SWORN that my nails were dry, but because there were so many layers of paint on my nails (from the top coat between tapings), they ended up looking like crap by the end of the day.
So I scrapped those nails, and decided to try something different. I saw this Chalkboard Nails tutorial, and decided that I wanted to give it a shot (it looked very doable, and I didn't have much time).
I love how they turned out, though they're not quite what the tutorial called for. I just loved layering the colors, and the barely-any-polish-on-the-brush technique.
My mom said that they are "beautiful and absolute chaos," and I have to agree.


Deconstructed Roses

Essie Devil's Advocate with China Glaze Flip Flop Fantasy and That's Shore Bright, Wet 'N Wild I Need A Refresh-mint
 This design was inspired by a post at Paulina's Passions, one of my favorite blogs to follow. I was so intrigued by the kind of abstract rose that just seemed to form on the nail. I also wanted to practice painting my nails a dark color. Normally, I stay away from dark base colors because I always seem to mess up and stain my cuticles and it's an absolute nightmare. But practice makes perfect! And this was a relatively painless experience!
And it definitely helped that this is probably the best very dark plum/not quite black color ever! Devil's Advocate is so rich, and much warmer than plain black polish. It can pass for black without being so harsh. It was very smooth, and almost a one-coater, but two quick medium coats do the trick!


Serum No. 5 Pink Lantern


Let me just start off by saying that this polish in UNREAL. I had seen Serum No. 5's Dayglow all over, and it looked cool, but I didn't think I'd use the polish very much. But then! I was so moved by this Chalkboard Nails post that I immediately ordered Pink Lantern for Halloween, and didn't look back!
I love that it's a very wearable baby-doll pink in the light, and has such a warm glow in the dark. With only minimal charging (<30 sec), the glow was so bright, and lasted a long time. I charged them for about 2 minutes under my bright desk lamp before going to a Halloween party, and I came home 4 hours later with still-glowing nails.
I'm such a fan, and I will likely order again from Serum No. 5 (and not just for glow-in-the-dark polishes)! 

Simple, Yet Jazzy Tape Mani

China Glaze Nude and That's Shore Bright!, Essie Devil's Advocate

I think it's safe to say that I love these nails! I am such a fan of the color combination; I feel like any base color besides nude would be a bit overwhelming. I used scotch tape to get clean lines (and I pressed the tape strips on my hand a few times before applying to the nail, so that it did not pull up the base) with That's Shore Bright, and was initially going to leave them just two-tone.
But I got the bright idea to add some dots where the colors meet, and I'm glad I did! I feel like they really tie everything together, and make the mani that much more sophisticated!


September 9, 2013

Been There, Done That


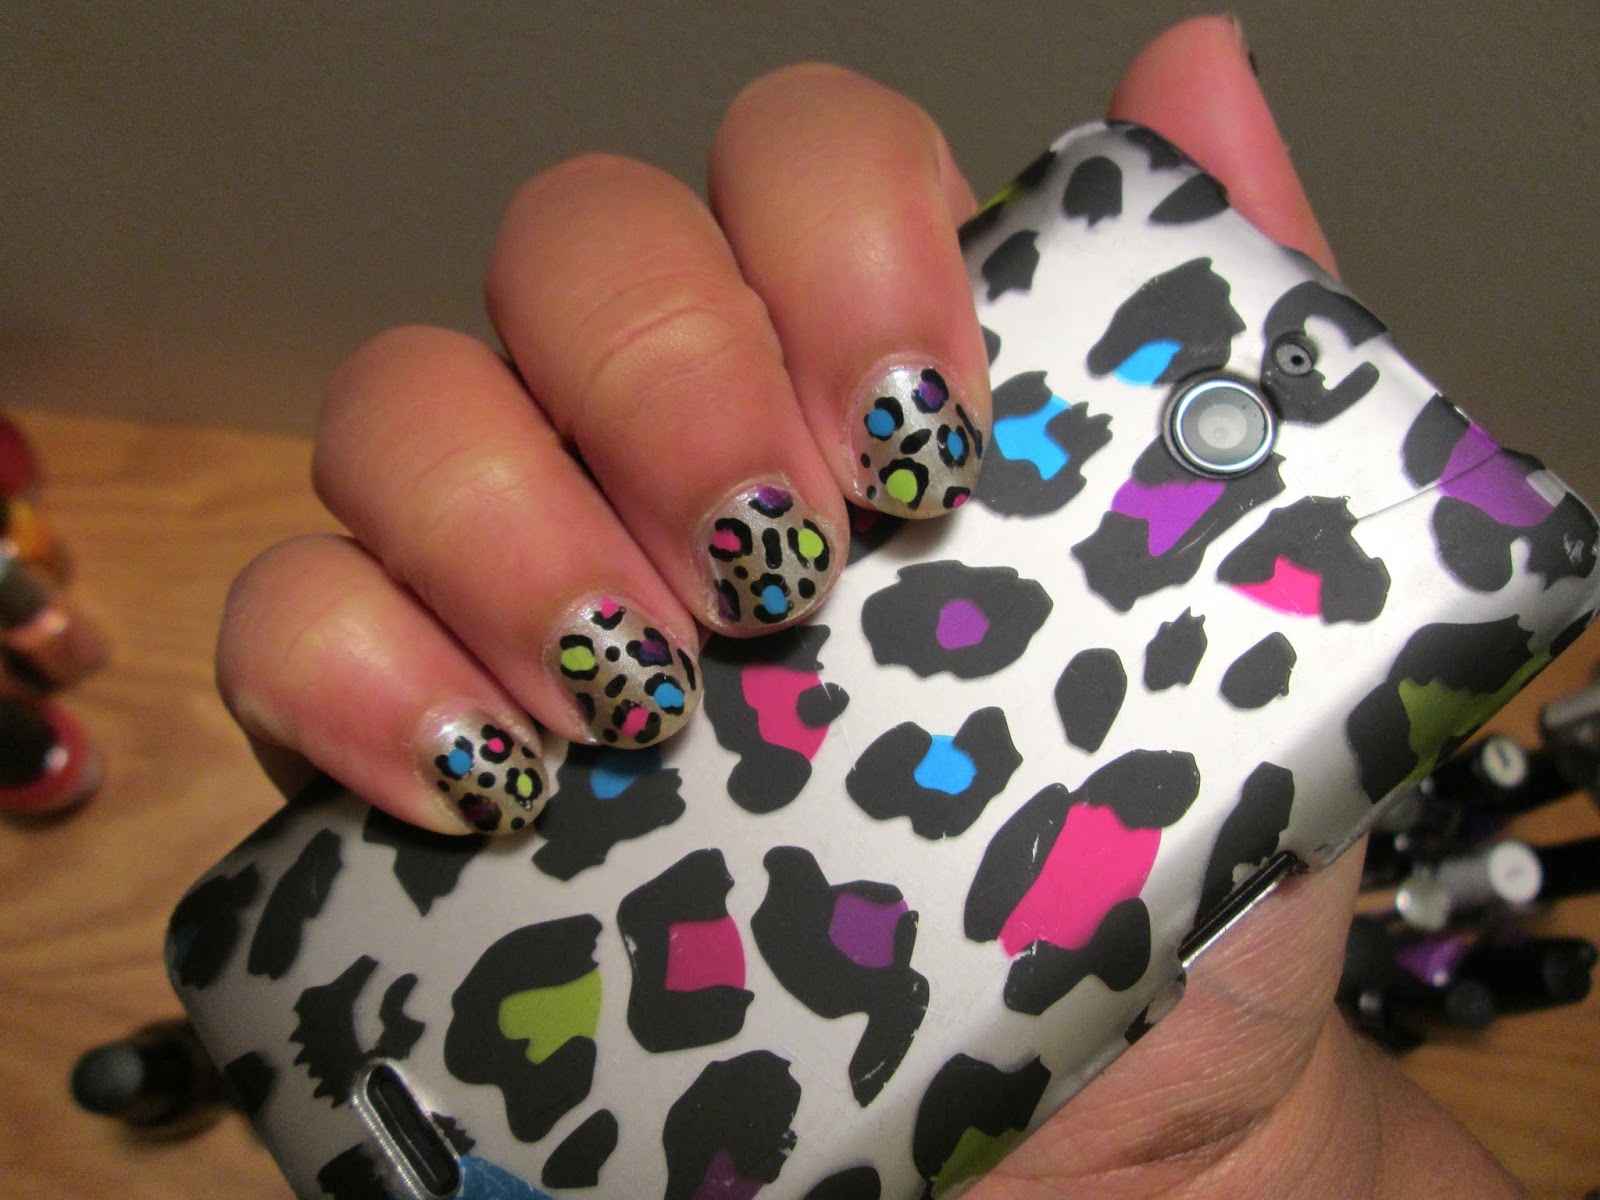
Base: Icing Champagne Bubbles
Colors used: L.A. Colors Circuits, Revlon Empower, Sally Hansen Xtreme Wear in Purple Potion, Green with Envy and Blue Me Away!


I have done this simple nail art many times before, on my own nails, and on those of friends. It never gets old, in my opinion. I wish I had "before" pictures, so I could properly show how much I've grown since first getting into nail art.

But to review: I painted two coats of my base color. Next, I made C-shapes and almost-closed circles with a bobby pin and a dark color (This time it was a black, LA Colors' Circuits). After cleaning my bobby pin acetone, I used it to fill in the Cs and circles with bright colors. Afterward, to fill in gaps, I used the black color to make small dots and lines all over the nail.

I only had a few minutes before I had to dart off for choir rehearsal today, and this was something I knew how to do. The "inspiration" for me recreating the design came from my phone! (The case, to be specific). It looks like this:


It's kinda cool having my nails match my phone. I've gotten some positive feedback, so for future projects, I'm going to draw inspiration from other sources close to me. (Maybe outfit inspirations? Hmmm...)


Related Posts Plugin for WordPress, Blogger...